Friday, April 29, 2011

A Little Yarn Bombing


A couple of weeks ago I did a little private yarn bombing project.  I was inspired by someone near and dear to me who had been doing a lot of work with rocks in her yard. Once the idea struck me, I couldn't wait to do this.


OK, so I covered 4 rocks and one brick, for a little extra humor.  


I began with this rock and it remains my favorite.  This one is crocheted. I made up the design as I went along, "engineering" it to fit.  


It was a fun challenge to figure out how to crochet something to fit around an ovoid.  


The rest were just rectangles that I knit on relatively large needles and sewed closed around the rocks.  I decided to make plastic tags for each rock that said 1/5, 2/5, etc., so that my victim could figure out that there were five to find.  When I placed them in her yard, some were more obvious than others .


When I am surrounded by rocks like these -


...it really doesn't seem THAT bizarre to cover rocks with fuzzy yarn.


To see some really amazing yarn bombing projects, check out yarnbombing.com.  One recent project that is particularly stunning is shown in the post http://yarnbombing.com/hello-spring.  I'd love to know how they got the fire department to help with the installation!


Tuesday, April 26, 2011

Wooly Peeps


Rock star peep

Not too long ago Craft Magazine posted a link on Facebook to a very clever Easter-y project by radmegan  - needle-felted Peeps!  What a great idea!  Luckily my thoughtful cousin re-posted the post and tagged me.  I bought the instructions from radmegan on Etsy and had quite some fun.  I'd forgotten how great needle felting is.  Except for the pain from occasionally poking my finger...

I was lucky enough to take a needle-felting class by the amazing Moxie several years ago, so I had amassed the necessary tools -

foam block and sharp-as-heck felting needles
wool roving

By the way, Moxie has foam blocks that are biodegradable, which is very cool. This one is from a kit that Weaving Works sold that included needles.  I came upon this multi-colored roving in the knitter's guild booth at the craft fair held out in Ocean Shores over Thanksgiving weekend.  You can buy single colors from sources like Weaving Works.


So, it was obvious that whereas radmegan's peeps were true to the real Peep colors, mine were going to be funky.


This handful of roving -


equaled this peep - 

Tropical sherbet peep?

A few more -

Tie-dye peep for my cousin  :)


Peep gang


Then one last design that I HAD to try - 

skully peep


Rock star photo of skully peep

Thursday, March 10, 2011

Watercolor on Gessoed Paper


I was lucky enough to get to take a watercolor workshop at Pratt this past weekend with my younger son.  I wasn't sure which way he would go when I suggested that I sign him up with me, but he didn't hesitate to say yes, which I thought was awesome.  He was the only male and the only youth/young adult, and the instructor said she thought he was brave (?!) to do it.  Regardless, he liked the class a lot and I thought I was the luckiest mom on earth.

The class was all about painting with watercolors on gessoed paper.  You can get some pretty intense colors out of your watercolors this way, AND you have more of a chance for do-overs since you can wipe your paint back off.  To varying degrees.

This is my first painting, which makes me nauseous. But it was a learning experience -


The smaller I make the image, the better, as far as I'm concerned (it's really ~7x11").  The photo makes more contrast in the background than there really is.  And the pink?  Not my marks - the instructor added them.  I've not had that happen before!  Ever.  Anyway, this wretched painting gave an idea for how to tackle the beautiful moonflower in a different way next time, so all is well.  I think it would have been a better one to do on regular watercolor paper.


Version #1 - The instructor pointed out that I was certainly painting like an oil painter.  But I was enjoying the brush strokes.  I tried to work "juicier" in the middle and bottom but this amazing Quinacridone Gold bunched up and looked like strong brush strokes on its own anyway.  I'm learning.  I hate the lighter colors added onto the black at the base.  That was a suggestion, and I should cover it over...  It looks like reflections/ripples in  this photo.


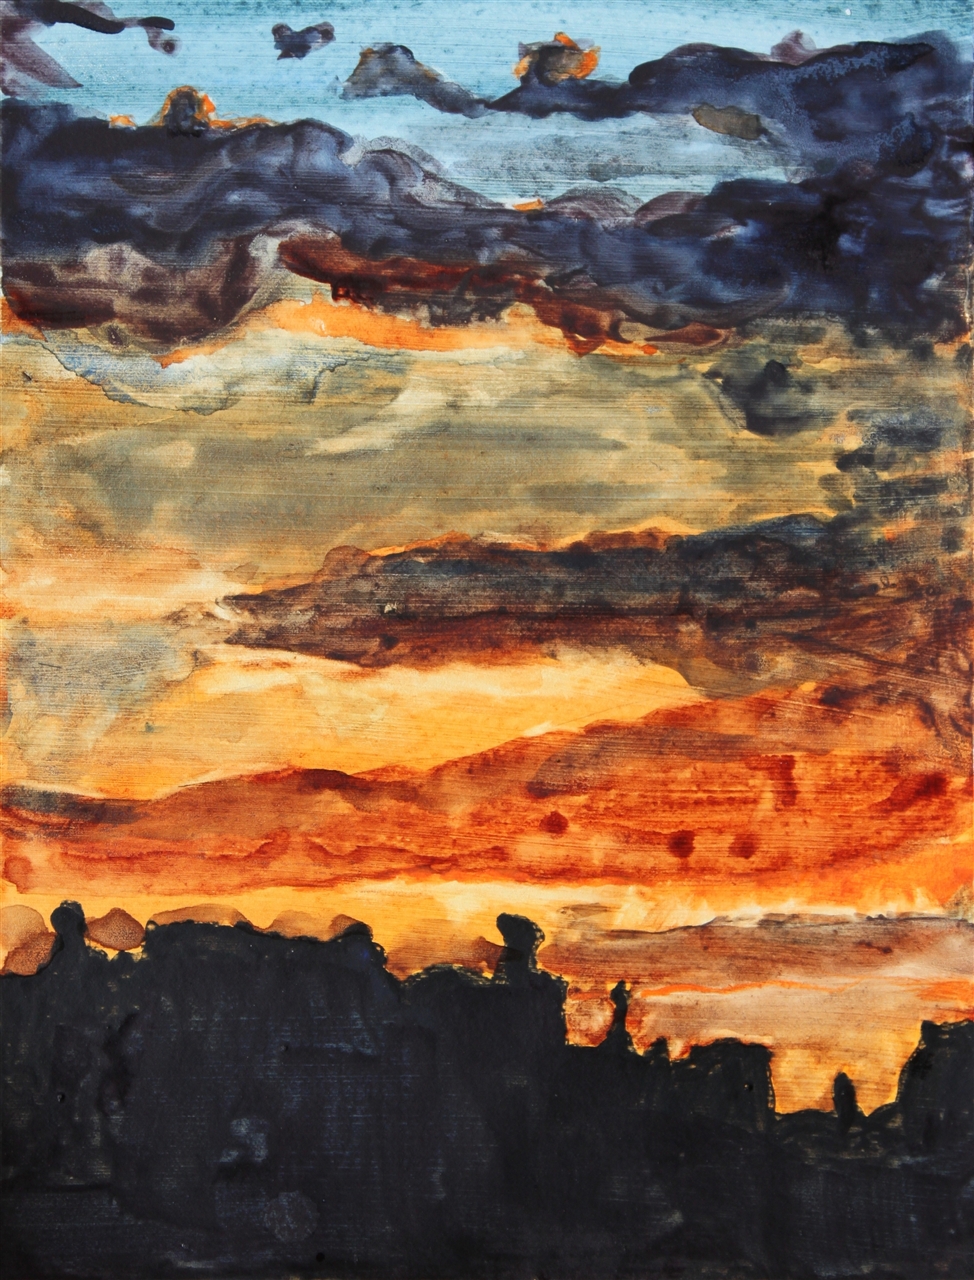
Version #2 - Tried to stay looser and juicier.  I also tried to make the silhouettes look less like buildings and more like the rocks that they are.


I was working from a copy of the photo below. Our instructor encouraged us to feel free to "adjust" (my word) our subject and not worry about it being exactly true to life, which is a very freeing idea for me to always keep in mind.  When I looked back at the original photo again, it just makes me want to experiment more with the colors and the glowing light in this photo - 


Maybe I shouldn't have put the photo on here, because it is so superiorly gorgeous!!  If anyone wonders why we keep going back and going back to Utah's redrock country, this is a great example of why.  This photo was taken at the Golden Stairs camping area in the Maze District of Canyonlands.


Tuesday, February 8, 2011

Still working towards selling on Etsy....


This has been my ongoing project for, oh, 2+ years - to actually list some things to sell in my Etsy online shop.  Looks like I may be a little late to take advantage of Valentine's Day gift shopping (oops! second year in a row!), but hearts aren't only for V-day?!


Today I worked on mastering the art of the adjustable knotted cord necklace.  That's what I've decided upon for for turning my pendants into necklaces to sell.  I think I worked out a length that adjusts from choker length (16"-ish) to approximately 32".  I'm using a faux-leather cord - 


I found the most helpful tutorial with excellent photographs of the steps here - http://www.ejrbeads.co.uk/adjustable%20page%201.htm


I read somewhere that the best lighting for taking photos of your items is daylight on a bright, cloudy day.  Here are a few photos taken in the sun the other day - 


I like the shadows myself.  I'll experiment with more photos on the next "bright, cloudy day"....


Monday, January 17, 2011

Just try it, already!


Bwaaahaha! That's what I told myself, "Just try it, already!", and look what happened!  I really can't believe that this worked out as well as it did.  


Because I save broken glass stuff  (I can hear you, Eric!), I had two broken wine glasses from the set that belonged to my parents, one glass with a broken base, and one with a broken top.  It occurred to me that maybe, just possibly, I could use the torch to combine the good parts to make a new glass.  I figured I really didn't have anything to lose.  


I couldn't believe that the glass didn't fracture while heating up or cooling down.  And I can't believe how well the junction turned out.  I hoped to do something besides a lump where I melted them together, but I didn't expect to be so happy with the connection.  This "crystal" glass seems to have a fairly low melting point, but not the sensitivity to thermal shock that the "soft glass" rods that I have for bead making have.  Score!

Before you start bringing me broken wine glasses to fix, keep in mind that I think this was beginner's luck!  A martini glass that I tried to re-attach to its base did not work.  So it goes back in the garden.


Uh, those weren't the only glasses to break.  This is one that I slumped in the kiln until it was flat.  I did this a while ago.

Tuesday, January 11, 2011

Latest Work in Recycled Plastic Bag "Yarn"


I made this bag for my mother-in-law out of New York Times delivery bags that she collected for me.  My plastic yarn bags are usually striped, being knit with "yarn" made from a variety of plastic bags.  But I found that these soft newspaper bags are definitely a nice type of plastic to stick with for an entire bag.  I loved this blue, and I was happy to discover that I was using NYT bags in two slightly different shades of blue.  The black print gives the finished product an almost heathered look, if you use your imagination.

Thursday, January 6, 2011

Rain Wind Chime


The rain has obviously returned.  Maybe I brought it back by finally finishing this idea that was stuck in my head. I was thinking of slow-motion raindrops.  


glass, a chunk of corkscrew willow, copper wire and fishing line
approximately 12" x 5"
residing at Carol's house


Sunday, January 2, 2011

Resolution


Ok, ok, I am brushing away the cobwebs on this ol' blog and I'm determined to post more frequently this year than last year, which  *ahem*  won't be too hard to do.  So I guess that's my New Year's resolution, if I'm pushed to state one.  

Two above-and-beyond-amazing events occurred in my studio in 2010.  First, I have incredible new workbenches/organized storage space. I guess I lost the "before" pictures of the studio that I had taken, but here are a couple shots taken today.  Some other time I'll post pictures of the lengths of bowling alley that Eric's co-worker turned into these incredible, bullet-proof counter tops...


The second monumental thing to happen in the studio was that I finally got a bench-mounted torch for working with glass.  I'm so excited to be able to work with glass in 3-D.  I took a Flameworking class at Pratt Art Center this fall that gave me the final nudge to get set up in my own studio.  Pictures from that class later.  


Meanwhile, here are more pictures of my little vessel creature.  It just makes me smile.  I can't wait to do more.


Happy New Year!