Saturday, January 31, 2009

Working on Glass and Copper Pendants for Etsy...

I was JUST telling a class of 4/5th graders that art can be all about problem solving, and I think I jinxed myself!  Luckily not in a major way.  But this is an example of why I added the Whimsy LABS to my blog name!  

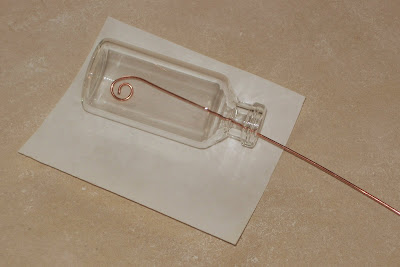
A friend has been encouraging me for a long time to make a fused-glass pendant with a heart shape crocheted out of copper wire, along the lines of the flower that I have done in the past.  For me the heart shape isn't a shape that I think of crocheting like the flower was, but I'm willing to try it.  Meanwhile, I had the idea to simply make a heart shape out of copper wire and pound it flat a bit before fusing it, like this:


The ring for hanging and the heart are made of the same guage of wire.  How handy that we lucked into inheriting a modest-sized anvil that I can bang on!


I know from previous -ahem - experience that little air bubbles can get trapped inside of shapes that are fused in glass, so I decided to try to eliminate that possiblity in the little hearts by sprinkling some clear frit (finely ground glass) into the center of the hearts to fill the space.  You can see it on the darker pieces in this picture taken before I put them in the kiln:


As it turned out, the one "control" piece without frit inside the shape didn't have any bubbles, and the ones WITH the frit all had tiny bubbles to some degree!  Oops.  (This picture is really bad - the light was fading outside by the time the batch was cooled down enough to remove from the kiln.)  


Here's a close-up of a few (the piece on the right is my "control"):


They are basically OK, but I know they could be better....so I'll do another bunch today.   I did crochet one heart shape, so I'll keep working on that idea, too.


Tuesday, January 27, 2009

BeadforLife beads


Back last November (or so) the Seattle Times had an article about an organization called BeadforLife. I had never heard of it, but anything with the word "bead" in it grabs my attention. I was super impressed with this organization and the beautiful things they sell. Here is their mission statement, directly from their website:

"BeadforLife creates sustainable opportunities for women to lift their families out of extreme poverty by connecting people worldwide in a circle of exchange that enriches everyone."


I love the fact that this organization is honoring the beautiful creative work of women by buying/selling their creations to help eradicate poverty in a respectful, ongoing, and hopefully long-term way.

BeadforLife was started so that instead of being paid $1 a day to work in a rock quarry, women in Uganda could be paid fair trade prices for their beautiful beads made out of recycled paper. Beadforlife's net profits are used to invest in community development projects in Uganda. Turns out, you can order jewelry or loose beads from their website, or hold a bead party to sell the jewelry for them, with BeadforLife sending you all the supplies you need for the party FOR FREE!

I would just like to dive into the bowl full of loose beads that I ordered from them.

Here's a bracelet that I made from the beads. I think I would like to somehow include at least one bead in things I make, even if it is just a decoration on the info tag of a knitted bag, to spread the magic of these beads further. Something simple, unpretentious and very beautiful made by a woman living halfway around the world.


Saturday, January 17, 2009

Slumping Insulin Vials

Experimenting with the glass from gin bottles led me to this idea.  Well, that and being fascinated by something that I think was called a "worry tree", I saw in the movie "Ray".  It was a tree with all sorts of empty glass bottles hanging in it, and they would clang against each other in the wind.  Somehow these two things got twisted together in my mind and I decided to slump empty insulin bottles with a piece of copper wire inside so I could make a wind chime out of them.

Here's how a vial looked before going in the kiln - 


And after, with a penny to show you the size of the bottle - 


I REALLY love manipulating stuff like this.  I wasn't sure what the glass would melt like, but because of my experience with the gin bottle glass I assumed these bottles also wouldn't melt as readily as the fusing glass that I am used to playing with.  I love the way it kind of flattened but kept its shape, especially the opening.

So for my next batch I laid out 8 bottles on my kiln shelf/tray and started them in the kiln about an hour ago, and this time I didn't put the wire in quite as far, hoping that the spiral at the inside end will end up in the flat middle part of the slumped bottle.  We'll see.  The bottles really wiggled around when I moved the tray for pictures and put it in the kiln, so things may end up slightly askew...


Knitting and Exercising at the same time?! Yes!!

For your amusement, here is my new set-up for getting some cardio (hmmm - fat burning is my goal, actually) exercise.  


So did you notice the yarn/knitting in the basket? 

What could be better?  Being able to knit while exercising seems too good to be true.  What better incentive to get the exercise, at least for me!  I don't really just sit down and knit too much, unless I am killing time in a waiting room somewhere or watching a movie.  Unfortunately, when I'm watching a movie I usually get distracted by the movie and forget to knit.

So there you go!  I used to hang my bike helmut on the handlebars and put my yarn in it.  Luckily, for my birthday Eric gave me a basket and paniers (is that how you spell it?!) for my bike.  Little did he know that he was providing a knitting basket.  tee hee!

Friday, January 16, 2009

Green Envy Socks


I walked by this yarn, totally did a double-take and couldn't go any further without it. It made me think twice about basically ignoring Red Heart yarns. (Oops! Sound like a yarn snob? Don't mean to) I love the color of the green that is the dominant color, and all of the added bits are so funky. This is the first time I've used self-striping yarn that is random. So the socks will match in general, but not with the same stripes/pattern. Cool! Socks are so fun to knit, but they sure take a long time for such a small project!


Friday, January 9, 2009

Felting Project Blooper

I love felting knitted pieces.  It is satisfying to transform a loose, floppy piece of knitting into a thick, substantial piece of material or a soft but sturdy object.  "Alterknits Felt" is a book full of inspirational projects, and the CRAFT: podcast happened to share the pattern for one of the projects in that book called "Hazel and Maude Pot Holders".  That inspired me to try making one of the pot holders to give as a Christmas present.  But it took me TWO tries before I realized that the "blister stitch" pattern was turning out like a rectangular grid rather than a honeycomb because I didn't follow the directions and stagger the different rows/sets of color.  GRRRR!  Dumb mistake.  So here's the first pot holder....


Another really frustrating thing about this piece was that the edge is an attached i-cord trim.  There ended up being way too many rows of trim along the sides, so the edges were/are wavy.  I picked up and knit on every row, and I guess I should have done every other.  The instructions don't specify, darn it.  That's why this pot holder doesn't have straight sides and isn't square!

I tried another pot holder, this time picking up every-other stitch on the sides for the finishing trim.  It's the one on the right below, and I think that worked out perfectly.  Then I had my "DUH!" moment, realizing that the pattern shapes weren't circular because I wasn't staggering the rows, which is necessary to make the blister stitch pattern work correctly when felted.  Won't make that mistake again!  Luckily my stubborn streak, combined with curiosity, causes me to keep doing a project over until I get it RIGHT.  So the third time I came up with the correctly knit pot holder.  It is on the left, obviously:


It's interesting to see the two patterns side by side.  


Here they are after the first felting in the washing machine:


And here they are after a second felting:


Wahoo - finally succeeded!  I like the look of the mistake one, too, but it was so satisfying to learn how to get that honeycomb pattern.  These two were knitted entirely in Lamb's Pride Worsted, which is my personal favorite felting yarn.  It is fuzzy because of the mohair, but I like that.  I just had to give the pot holders a little haircut when I was done felting them.  Now I am going to make a larger version.  I need two more seat cushions/mats for our kitchen chairs, and this is a perfect pattern for one of them.  I like the fire colors.


Crooked Wind Chime

Here is a picture of my final wind chime creation for the holiday season, and it was specifically made for our wonderful neighbors. I had to wait for the snow to (finally) be gone from the trees long enough to find the perfect piece of corkscrew willow to hang the glass pieces from. I wanted to hang the glass from something besides a wood dowel, bamboo or another piece of glass like I had been doing. I wanted to use something natural and from our yard if possible, and luckily we have a couple of these inspirational corkscrew willows out there to work with.


I was originally thinking of a nature-ish color theme of blues and greens for the glass elements hanging from the twig. But I was inspired by the beautiful rainbow ground/yard that our neighbor's daughter made around her gingerbread house during the neighborhood gingerbread house decorating extravaganza, and I like the symbolism/meaning of the rainbow. The funny thing was, when it came time to figure out the mechanics of hanging the glass pieces from the twig, I ended up making swirls of copper wire, which happens to be similar to copper wire work that she does. So if I was to have named this piece, it would be named "Sarah"!

I just wish I had had some orange bits of glass and a better purple when the inspiration hit....